Jumping into making rich specialty coffee at home can be expensive, especially if you’re not 100% sure exactly what you need and don’t (and many people buy more gear than they need). There are tons of accessories and different items—it can all be pretty overwhelming.
But here’s the thing: you don’t need a ton of fancy, shiny gear.
You just need just two important items, the right coffee, and you’re good to go. And the best part is, it can actually be very affordable,
In this mini-guide, we’ll show you how you can make delicious cafe-quality coffee using pro-approved gear that’ll cost you less than your next disappointing auto drip coffee pot.
Read: The Ultimate Guide to AeroPress Coffee
Let’s see this budget setup.
Why The Aeropress Is Great For A Budget
Not all brewers are good for people on a budget—but the Aeropress certainly is, because here’s all you need: an aeropress and a burr grinder.
No special water pouring kettle and no coffee scale required. Other methods (like pour over coffee) do require these things and are harder to get started with on a budget.
You already have the other things you need (almost certainly)...
- Tablespoon
- Measuring cup
- Timer (your phone)
The point is, it’s not going to take much equipment for you to brew coffee that would satisfy even high-level Aeropress veterans.
Read: 5 Things Every Aeropress User Should Know
Should You Get A Reusable Filter?
It is true that you can use a metal filter to reduce your paper waste and filter spending, but it’s not a requirement. Both metal and paper filters produce great coffee. In my mind, using a metal filter’s more about adjusting the flavor to your tastes.
- The natural oils get through. These oils are responsible for vibrant aromas in your coffee, so letting them through to your mug gives the coffee a big flavor boost.
- Micro-grounds get through. These microscopic coffee particles give the coffee a fuller, richer mouthfeel. They also bind to the acid particles, which makes your tongue interpret the coffee as slightly less acidic overall.
Metal filters are an added expense, but they do save you money in the long-term on filters (though Aeropress filters aren’t that expensive). If you get one, do it for the flavor and body boost.
Read: A Guide To Metal Aeropress Filters: JavaPresse, Able, And Beyond
Up Next: A Burr Coffee Grinder
You may wonder why you can’t just use pre-ground coffee from the store—it’s cheaper right? Trust us, you don’t want to skip this part. It’s, in fact, the most important part!
Coffee beans don’t really go “bad”, but they do go “stale”—very quickly in fact. Once roasted, whole coffee beans only have 2-3 weeks of peak freshness. But pre-ground coffee? That only has 20-30 minutes.
Having a grinder of your own allows you to buy whole beans (which are undoubtedly fresher). It then allows you to grind only the exact amount you need for each brew (which preserves freshness).
Read: Why You Should Never Grind All Your Coffee At The Same Time
But grinders also empower you in other ways. They allow you to make small changes to the grind size to improve your brew’s flavor. For example, if your coffee tastes a little too bitter, you can make an adjustment to increase the ground size, which will result in a less bitter (less extracted) cup.
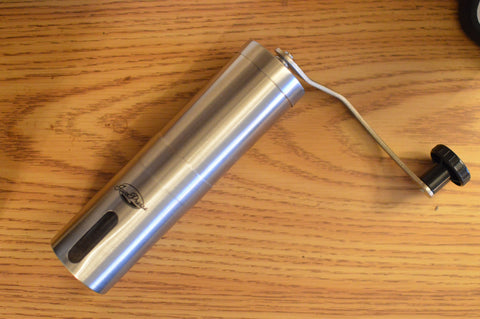
Thankfully, you no longer have to spend $100 or more to get a good grinder. In fact, you’ll need only $39—but it’ll be a manual grinder.
Manual grinders have their strengths—actually, a whole bunch of them.
- They’re much quieter
- They don’t need electricity
- They are portable
- And they’re just as effective as $100+ electric grinders
Don’t think for a second you can get away with one of those cheap blade grinders you may find at supermarkets. Sure, they’re electric and still just around $25, but they’re junk. They’ll only chop your beans into a bunch of differently-sized particles, not actually grind them to a uniform size. And those inconsistent grounds will brew noticeably imbalanced coffee.
Accessories: Do You Really Need Any Of Them?
There are a lot of Aeropress accessories, and some of them are really cool. But with just a brewer and a grinder, you’re already looking at a 95% boost in flavor from any regular coffee pot. Other accessories, while they may improve your coffee a small amount, aren’t necessary for amazing coffee.
Read: 5 Aeropress Accessories For Your Coffee Bar
The only accessory that you may want to consider is a coffee scale. Grams scales offer you incredible consistency and precision when you brew your coffee by telling you exactly how much water and coffee you’re using. No more guessing or “eyeballing”.
However, since the Aeropress is a smaller brewer without a bunch of room for error, it’s actually easy to be fairly consistent without using a scale.
Here’s how: use volume measurements instead of mass.
- 1g water = 1 ml water
- 1 tablespoon of whole beans = ~5g of coffee
For example, if a recipe calls for 20g of coffee and 320g of water, you’ll use about 4 tablespoons of whole beans and 320 ml of water in a liquid measuring cup.
See? While a scale does give you a consistency boost, it’s not essential for Aeropress brewing like it is with other brew methods, like pour over coffee and espresso.
---
These two tools are all you need to have an effective budget aeropress setup. However, you can’t forget where all the flavor actually comes from: the beans.
To level-up your coffee game, it is important to start with freshly roasted, specialty-grade beans.


